Creating your own jewelry is not only a fun and rewarding hobby but also allows you to craft unique pieces that reflect your personal style. Among the various types of handmade jewelry, clay bead necklaces stand out for their vibrant colors and versatility. In this guide, we’ll walk you through the materials needed and the step-by-step process of making a clay bead necklace. Whether you’re a beginner or an experienced crafter, this article will provide valuable insights and tips to help you create beautiful, custom necklaces.
Materials Needed for Making Clay Bead Necklace
Before you start crafting, it’s important to gather all the necessary materials. Here is a list of items you will need:
Essential Materials
- Polymer clay: Choose a variety of colors for a vibrant and eye-catching necklace.
- Clay rolling pin or acrylic roller: To flatten and shape the clay.
- Clay cutters or sharp knife: For cutting the clay into desired shapes.
- Needle or toothpick: To create holes in the beads.
- Baking sheet and parchment paper: For baking the clay beads.
- Oven: To bake the polymer clay beads according to package instructions.
- Jewelry wire or string: To assemble the necklace.
- Jewelry clasps: To finish the necklace.
- Beading needle: For threading smaller beads or intricate designs.
- Jewelry pliers: To handle wire and clasps easily.
Optional Materials
- Bead molds: For creating uniform shapes and sizes.
- Texturing tools: To add patterns and designs to the beads.
- Acrylic paint or varnish: For adding a glossy finish to your beads.
- Decorative beads or charms: To add extra flair to your necklace.
Having all these materials ready will make the crafting process smooth and enjoyable. Now, let’s move on to the actual steps of creating your clay beaded necklace.
How to Make a Clay Bead Necklace
Follow these detailed instructions to create your own beautiful piece of jewelry.


Step 1. Preparing the Clay
- Condition the Clay: Start by conditioning your polymer clay. Knead it with your hands until it becomes soft and pliable. This step is crucial to avoid cracks and ensure smooth beads.
- Roll Out the Clay: Use a clay rolling pin or an acrylic roller to flatten the clay to your desired thickness. Aim for an even thickness to ensure uniform beads.
Step 2. Shaping the Beads
- Cut the Clay: Use clay cutters or a sharp knife to cut the clay into small pieces. The size of the pieces will determine the size of your beads.
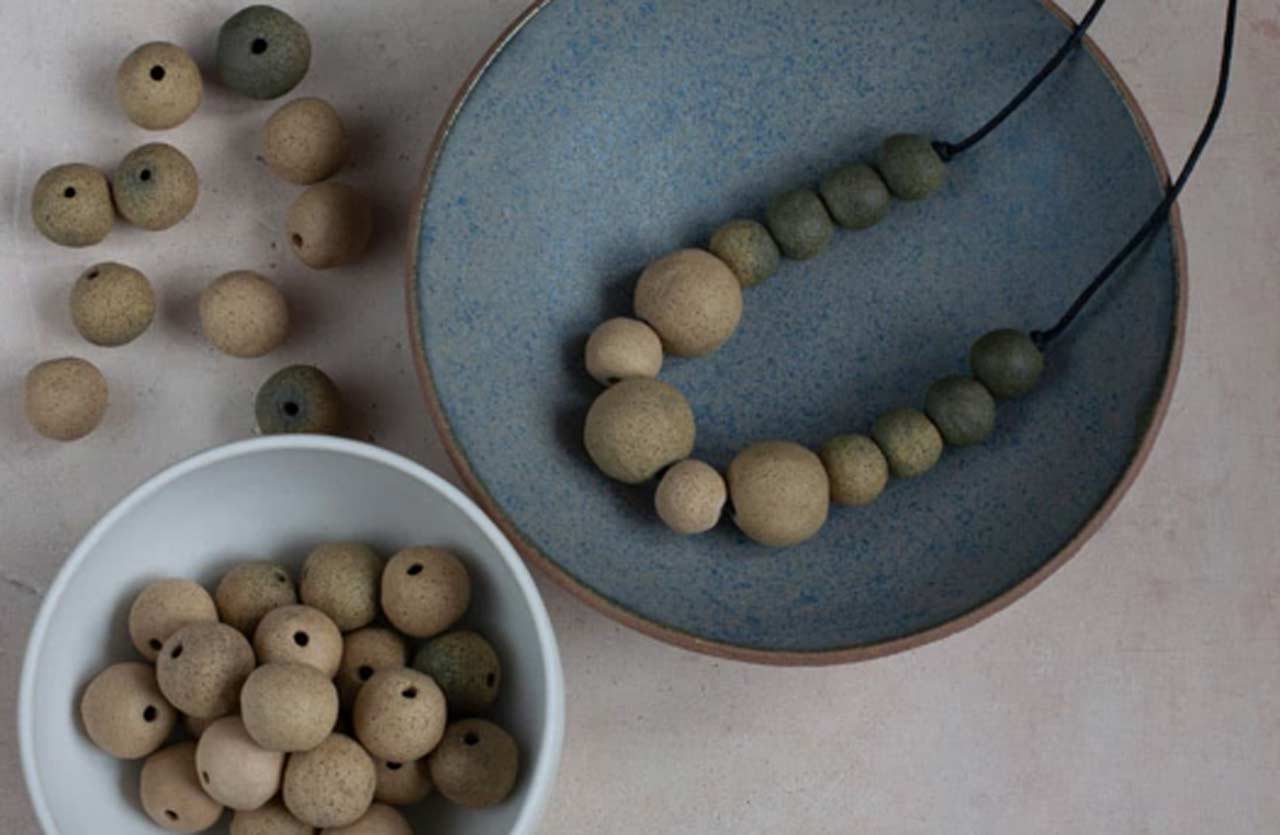
- Shape the Beads: Roll each piece of clay between your palms to form round beads. For other shapes, such as cylinders or discs, shape the clay accordingly.
Step 3. Creating Holes in the Beads
- Pierce the Beads: Use a needle or toothpick to create holes in the beads. Make sure the holes are large enough for your string or wire to pass through.
- Smooth the Holes: Gently rotate the needle or toothpick to smooth out the holes and ensure they are even.
Step 4. Baking the Beads
- Prepare for Baking: Place the beads on a baking sheet lined with parchment paper. Ensure they are evenly spaced and not touching each other.
- Bake the Beads: Preheat your oven according to the polymer clay package instructions. Bake the beads for the recommended time, usually between 15-30 minutes, depending on their size.
- Cool the Beads: Once baked, allow the beads to cool completely before handling them.
Step 5. Assembling the Necklace
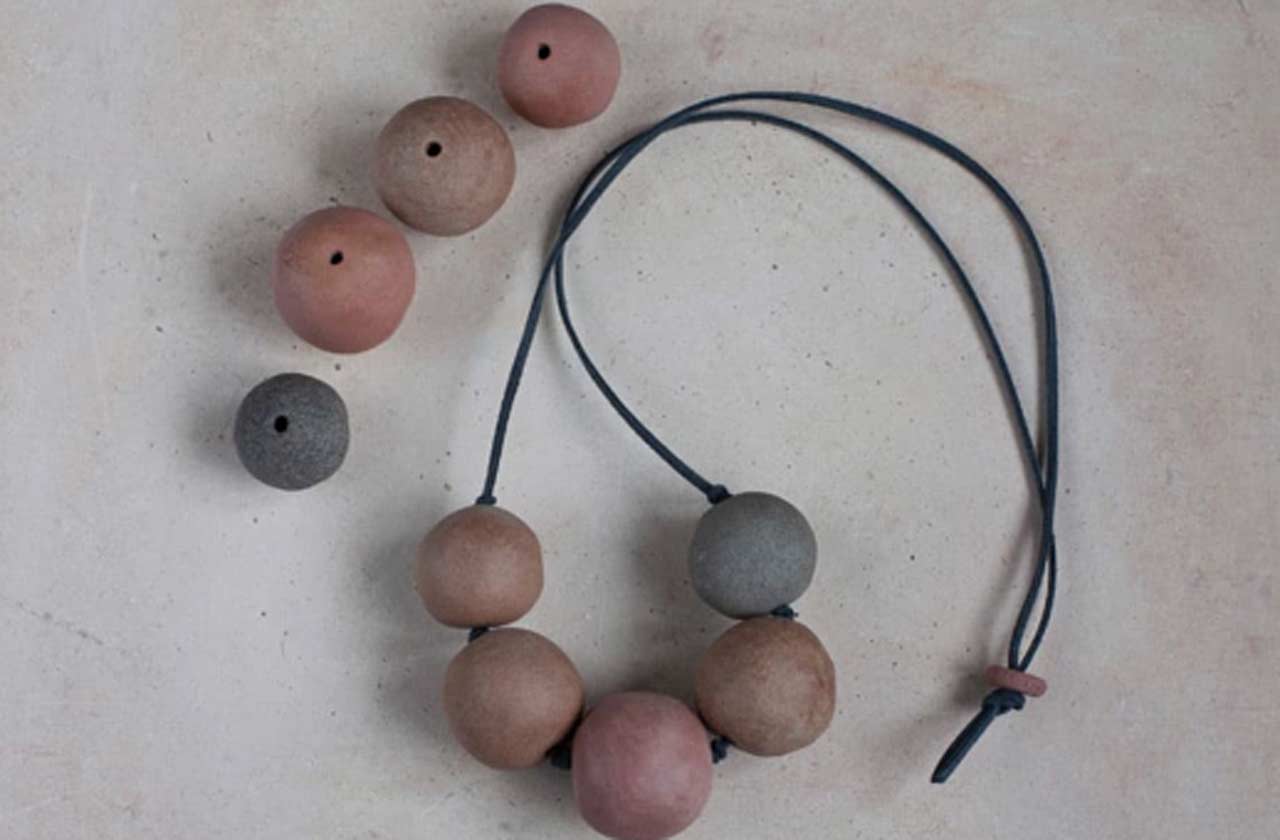
- Thread the Beads: Use jewelry wire or string to thread the beads, arranging them in your desired pattern. You can mix clay beads with decorative beads or charms for added interest.
- Secure the Ends: Attach jewelry clasps to each end of the wire or string. Use jewelry pliers to secure the clasps tightly.
- Finish the Necklace: Ensure all beads are securely in place and the necklace is the desired length. Trim any excess wire or string.
Conclusion
Creating a clay bead necklace is a delightful and creative process. By following these steps, you can craft a unique piece of jewelry that reflects your style. This guide provides a comprehensive overview, from gathering materials to assembling your finished necklace. Start crafting today and enjoy the satisfaction of wearing your handmade jewelry.